How often have you seen a photograph taken by someone else and thought, ‘Wow, I wish I had done that!’
Or maybe you’ve even taken some great photos yourself, only to realize later that they weren’t quite perfect.
Photography has become a hobby for millions of people around the globe.
Whether you want to capture memories or create stunning images, learning photography skills is easier than ever before.
There are several ways to take better photographs. The key is practice. If you want to get better at taking pictures, try these 7 simple tips we have for you today.
Hopefully, these tips will help you become a better photographer!
7 Photography tips for beginner and intermediate photographers
Photography has become very popular over the last decade. Many people now take photos using their smartphones or DSLR cameras.
If you want to improve your photography skills, then these 7 tips should help you get started.
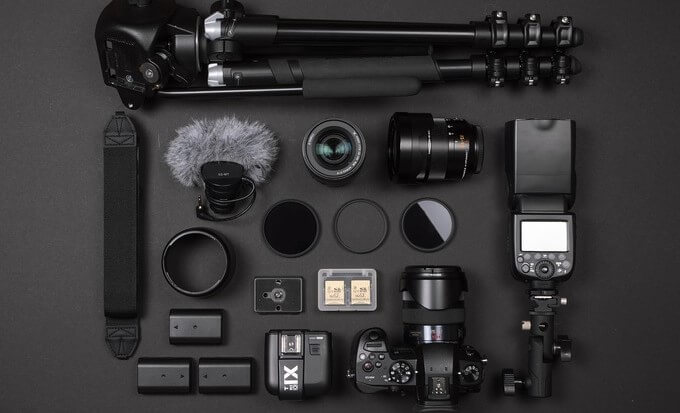
You don’t have to spend thousands of dollars on expensive equipment to start taking great pictures.
In fact, you probably already have some good gear lying around at home. All you need is the right knowledge and practice.
Here are seven basic photography tips for beginners and intermediates who want to take better pictures.
Tip nº 1 – Avoid shaky camera
Camera shake or blurring is something that can plague even the best photographers. Here are some tips for avoiding it.
You first want to know how to hold your camera properly; using both hands, one around the camera’s body and the other hand around the camera lens.
Also, make sure you are holding the camera close to your own body for support.
For handheld photography, make sure that you’re using a shutter speed that’s appropriate for your lens’ focal distance.
Whenever possible, use a tripod or monopod when taking photos.
Tip nº 2 – Make use of Polarizing filters

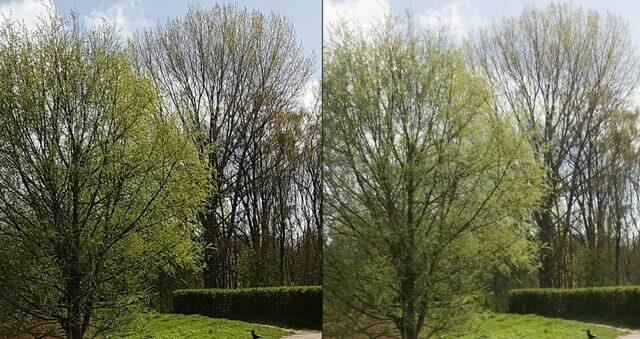
If you’re able to buy just one filter for your lens, choose the polarizer filter.
The recommended type of polarizing filter for cameras is circular because they let your camera use TTL (through the lens) metering such as auto exposure.
These filters help reduce the reflections from water, glass, and metals; it improves the colors of the sky and foliage, and will help your images look amazing!
It will also protect your lenses from scratches and dirt.
There’s no reason to not use it when taking photos.
Tip nº 3 – Use the RAW file format
RAW files are similar to JPG files, but they capture all the image data recorded from your digital cameras’ sensors rather than compressing it.
Shooting in RAW allows you to capture high-quality images and gives you complete freedom in editing them after shooting.
For example, you’ll be able to fix issues such as overexposed or underexposed photos, and change settings such as color temperature, white balance, and contrast levels.
However, shooting in RAW format takes up more disk space than JPEGs.
You’ll also want to invest in photo editing tools because RAW images will always need some post-processing.
Ultimately, taking photos in RAW mode can improve the overall image qualities, so if you have enough time and storage, it is worth it.
Tip nº 4 – Learn about adjusting white balance
White Balance can improve your camera’s ability to capture color correctly.
There are different types of lights, so if you don’t adjust the white balance, then the color temperature of your photos might be slightly bluish, reddish, or greenish.
You can fix white balance in post-processing, but it’ll take some time if you have hundreds of images that need slight corrections applied. So it’d be best to correct it in the camera.
Automatic white balance usually works fine in most situations, but it‘s generally better to adjust the settings according to the kind of lighting you’ve got going on.
Tip nº 5 – Remember to take your time
If you don’t pay attention to details when taking photos, you could end up making some mistakes.
One of the best ways around this is to slow things down and take your own sweet time whenever possible.
Particularly when you’re just starting out, taking your own time is one of the best ways to get better at photography.
Make sure you’ve checked your camera settings before taking any photos
If you’re taking pictures outdoors during the daytime, but you’re using last night’s settings, something is terribly wrong!
Don’t rush things; slow down and take the time needed to do it properly.
Next, maintain the same mindset when making any other important decisions.
Did you focus where you wanted to focus? Have you tried everything possible to increase the light levels?
Tip nº 6 – Always make sure your camera lens is clean
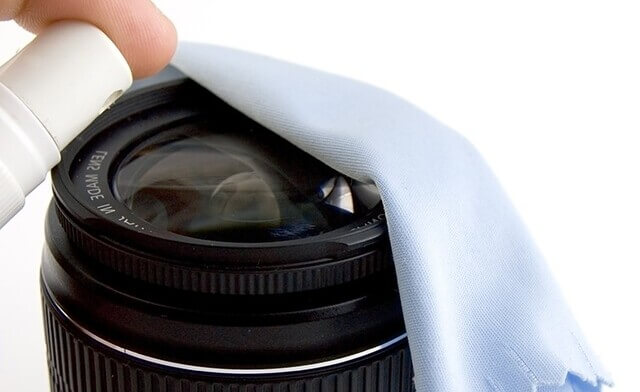
I often witness too many people walk around with the front element of their lens dirty, dusty, or smudged.
It’s the easiest way to take blurry photos every single session.
Of course, a small amount of dirt won’t do any harm; it wouldn’t even be noticeable in an image.
Every camera has tiny particles of dust inside its lenses, which cannot be cleaned without disassembling the camera.
Instead, I’m talking about lenses that have never been properly washed, which have dust and dirt built up for months at a time.
Get a microfibre cloth and lens cleaning solution.
Bring them along during your photography sessions and use them at least once a week.
Tip nº 7 – The name of the game is practice and practice
Photography tip: Take photos every single day. You need to practice until you become good at what you do.
Create some creative boards on Pinterest to inspire yourself and curate your best images that fit a certain theme.
Try new things! You’ll get a lot out of the experience.
3 Photography tips for Smartphone users

We’re all familiar with the basics of taking photos on smartphones: You pull out your smartphone and press a button.
But if you really intend to keep those memories forever, then you’ll need to take good photos.
Here are 3 tips to help you improve your smartphone pictures.
Tip nº 1 – Adjust your smartphone’s focus and exposure
Smartphones’ camera technology has improved dramatically in recent years, and most smartphones now offer some degree of manual control over their settings.
To activate manual focus, just touch the screen at the point where you’d like the camera to focus.
Make sure to check in the camera app’s settings too.
If you find a facial recognition feature, it’ll help you avoid blurry photos by focusing on people’s faces.
There’s also the exposure, which refers to how much light is allowed inside the camera’s field of view.
Regardless of whether you’re using an iPhone or an Android device, it’s the same story.
You can tap once to focus, then use the sliders that appear at the side or top to adjust the exposure.
Tip nº 2 – Always prioritize natural light when possible
Lighting is one of the most critical elements in any photograph.
You don’t need to rely on your phone’s built-in flash if you can take advantage of the available natural light.
When shooting portraits, if you can, position your subject so he/she is well-lit from the front and not shadowed by a bright background.
Of course, sometimes it may not be possible for quick shots, so do what you can.
Artificial lighting can be used instead of natural sunlight if necessary. However, you need to be careful when using artificial lighting.
For example, in a night shot, arrange your friends so they’re standing close to the light source instead of deep in the shadows, and ensure their faces are as well illuminated as possible.
Using the camera’s built-in flashlight may be helpful, but if you have some extra time, take a few shots using the flash and then compare them to ones taken without the flash.
Tip nº 3 – Make use of the night mode

Night Mode has been one of the most significant shifts in smartphone camera technology since the advent of smartphones years ago.
All the latest smartphones from Google, Apple, Huawei, Samsung, etc., have some kind of “night mode” feature.
Use it if it’s nighttime.
Night mode helps the phone understand what kind of image you want to share and uses a lot of technology to improve, correct, and create images that are worthy of sharing.
Night mode lets you shoot scenes handheld that would’ve been impossible on smartphones just a few years ago.
Some models will even allow you to take long exposure shots for even better results.
It doesn’t need to be super artistic either; it could just be some fun photos with your best friend.
In conclusion, photography has become such a popular hobby among many people today that it’s almost impossible to find someone who doesn’t have a camera in their pocket.
And if you’re like most people, you probably take hundreds of pictures each year – some of which end up being pretty decent, but others of which aren’t quite right.
But even though taking great photographs isn’t always easy, it’s definitely possible.
All you need is practice and patience. I hope these tips can help you improve your photos and help you become the photographer you want to be. Keep us updated with your progress!